Honey Can Cook

Tag: chewy

  • Honey Bees & Jalapenos

    Honey Bees & Jalapenos

    Honey-Jalapeno Glaze

    This week I acquired 2 more bee hives.  My man Dan and I removed 2 hives from 2 water shut off boxes, both in the same yard, just a few feet from each other.  The entire removal and set up took us about 5 hours.  Luckily it was a bit cloudy and cooler on the day we removed the hives.  The house where they lived is on a road called Helms Trail.  I discovered my man Dan’s favorite part of removing and keeping bees is naming them.  What?  That was my idea, but he is so clever I let him name one of these hives.  After we’d finished placing the second hive into a box to travel home and were about to load up he announced, “well, I think it’s time to name these girls!  I think we should name them Helmsley – you know since we’re on Helms Trail and all!”  I died laughing, “Ok,” I said, “we’ll call it Helmsley Hive and the queen is Leona.  We laughed and later had to explain to Miss T exactly who Leona Helmsley is!  If  you are too young to know – google her! The other queen has yet to be given a name – stay tuned.  Following the recipe below are a few photos from our adventure.

    Not to overcrowd my bee yard, I called a friend with a lovely little farm, down the road and asked her if she’d like them placed on her property.  Once before, this cheerful woman, a New Zealander, had told me if I ever wanted to put hives at her place she’d love it, after all her grandfather had kept bees.  Her farm has miniature donkeys, peacocks, sheep and an assortment of dogs, cats, chickens, etc.  We placed them on a levee above her biggest tank (pond) with wind block and access to all her lovely gardens.  She names gardening as her number one hobby and it shows in her beautiful yard.  Wildflowers, lilies, mint, zinnias, bulbs of all kinds, always a beautiful flower to see when passing by.  A wonderful new home for my bees complete with a wealth of honey producing sources.

    2 New Hives

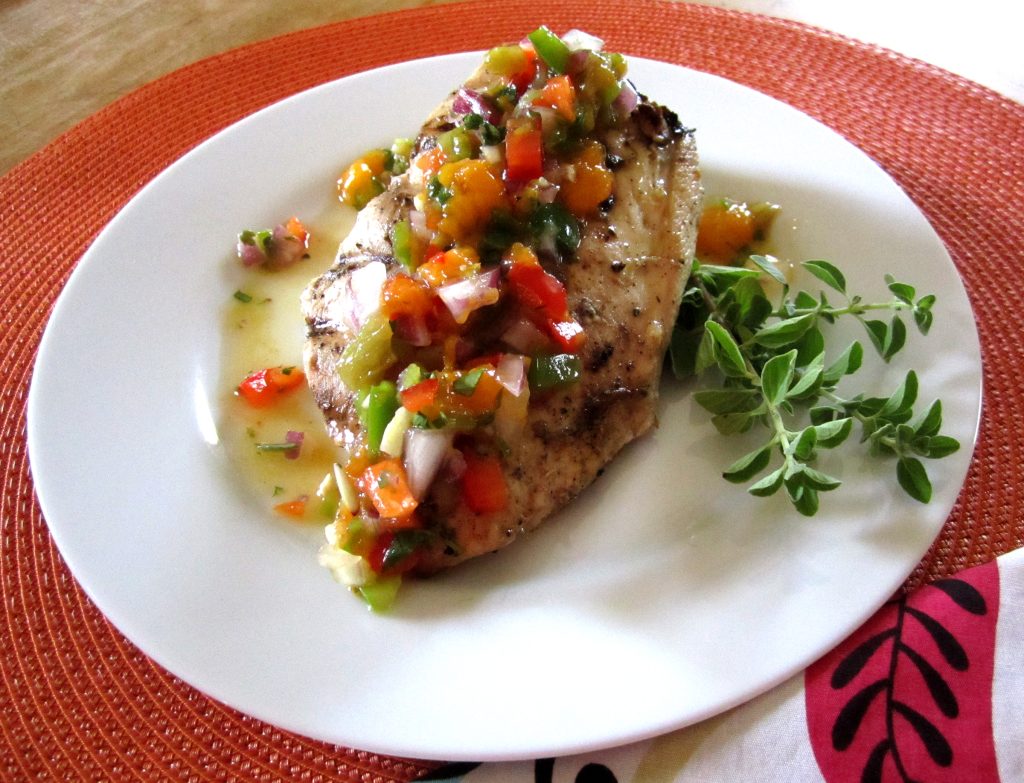
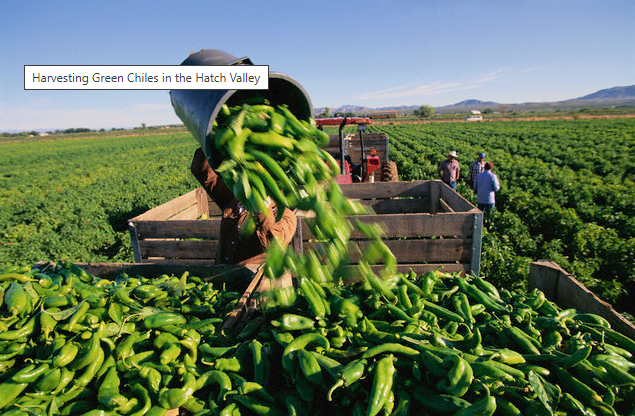
    Speaking of honey…In my ongoing effort to offer healthy food for my family I chose salmon as a main course one night this week.  I was a little short on time and needed a quick seasoning trick for the fish.  I thought about the rich flavor of salmon and wanted something different.  My go to is a soy sauce, lemon juice, ginger mix that is delicious but I aspired for something different.  Always looking for ways to use honey I thought, “hmmmm honey and…..(still thinking) something peppery, a sweet-hot combo”  Here is what I came up with; “Honey-Jalapeno Glaze”.  This ranks as the easiest salmon I’ve ever made.  The sweet and spicy glaze is the perfect derail for salmon’s richness.

    I tossed a few split, seeded jalapenos on the grill alongside the salmon and they were the perfect accompaniment to the glaze, which is not too sweet nor too hot.  No my friends, it is perfection brushed on a beautiful piece of deep pink-orange salmon.  Remember the health benefits of salmon, which is full of Omega 3 fatty acids.  It’s good for your heart, your eyes, your brain and nerves.  Salmon is also rich in some essential minerals such as iron, calcium, selenium, phosphorus and vitamins like A and D.  Among allergy sufferers there is a widespread belief that locally produced honey can alleviate symptoms.  It’s said that a spoonful a day can help build immunity to local allergens.  No matter the reason you may be eating salmon or honey the following recipe delivers a delicious meal.

    Enjoy!

    Honey Jalapeno Glazed Grilled Salmon

    Honey-Jalapeno Glazed Salmon

    Ingredients:
    4 salmon fillets
    3 tbsp. honey
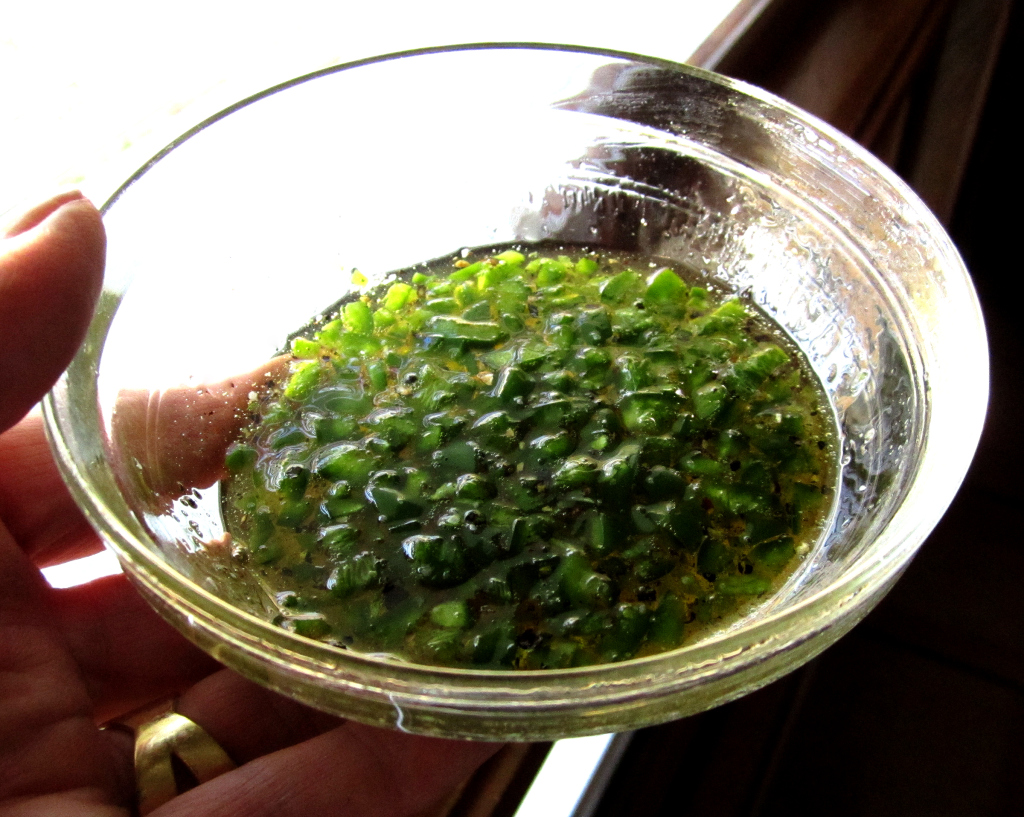
    2 tsp. finely chopped, seeded jalapenos
    1 tsp. Salt
    1/2 tsp freshly ground black pepper
    4 jalapenos (to grill on the side)

    Brush grill rack with a little oil.  Lay salmon on grill racks, over medium high heat, skin side down.  As salmon begins to cook spread a little glaze on each fillet.  Continue brushing fish with glaze until salmon is opaque and cooked through.  ( I do not flip my fish when grilling) .  Toss on a few seeded and split jalapenos on the side, grill until charred and serve with the fish.

    Dan wielding the "bee vac". This is a useful tool in removing the stragglers.
    Foam is placed in the bottom of the vacuüm tub to give the girls a soft landing. Shaking them off in front of a hive box.
    Bees at the entrance of the hive that will transport them to their new home.


    The Bee-Mobile
    That's moi setting up the new hives. Leaving chunks of leftover comb for the bees to clean up and carry into their new home.
    Bees love sugar syrup. I like to pour out a small amount and watch them find it and devour it.
  • Green Goddess

    Green Goddess

    I am a stickler when it comes to salad dressings.  I can be seen using olive oil and vinegar with a few turns of fresh grated pepper before you’ll catch me pouring dressing from a bottle that came from a shelf in the grocery.  I prefer whisking together my own ingredients and often the dressing is based on what’s in the frig and pantry.  If I’m too lazy to perform the task of making fresh, homemade salad dressing I’d still rather go with simple oil and vinegar, sometimes just vinegar.  I love that seasoned rice vinegar sprinkled on any salad, it’s so refreshing.  Sweet and tangy all at the same time.

    Today I’m sharing a recipe for Green Goddess dressing.  I’ll admit now that I didn’t have anchovy paste in the pantry so my dressing is sans anchovies.  I imagine the salt content might be overload for me had I used anchovy paste anyway.  The fragrant herbs used in the dressing filled the kitchen with notes of licorice from the tarragon and that sweet but peppery fragrance of oregano.  The dressing is creamy, aromatic and addictive.  It would also make a heathy dip for veggies or crackers.

    I became curious about where this dressing with this fabulous name came from.  Green Goddess – sounds so exotic.  Reminds me of Absinthe, but you won’t go crazy or cut off  your ear if you have a little dressing.  I’ve posted a short bio along with the original recipe below so you too will know how it came to be.  The Palace Hotel is in San Francisco.

    The History of the Green Goddess Dressing 

    The Green Goddess Dressing was created at the Palace Hotel in 1923 by
    Executive Chef Phillip Roemer.  Chef Roemer created the dressing for a
    banquet held at the Palace. The event was honoring actor George Arliss
    who was the lead in William Archer’s hit play “The Green Goddess”.

    Original Palace Hotel Green Goddess Dressing

    Makes 2 cups

    Ingredients

    1 cup mayonnaise
    1/2 cup sour cream or plain yogurt
    1/4 cup snipped fresh chives or minced scallions
    1/4 cup minced fresh parsley
    1/4 cup chopped fresh tarragon
    1 tablespoon fresh lemon juice
    1 tablespoon white wine vinegar
    3 anchovy fillets, rinsed, patted dry, and minced
    Sea salt and freshly ground pepper to taste

    Directions

    Stir all the ingredients together in a small bowl until well blended (or if you prefer your dressing creamier, throw it all into a food processor or blender and pulse for 30 seconds.) Taste and adjust the seasonings. Use immediately or cover and refrigerate.

    I served the dressing over a salad of leaf lettuce, with toasted pine nuts, and thinly sliced ricotta salata.  Ricotta Salata being a pressed, salted, aged and dried variety of the Italian ricotta cheese.  Ricotta salata is of a consistency perfect for shaving or grating, unlike its moist, creamy cousin, which most of us are familiar with.

    Below is my version of Green Goddess Dressing.  Enjoy!

    Green Goddess Dressing

    Ingredients:
    4 tbsp. low-fat plain yogurt
    2 tbsp. light sour cream of Mexican crema (I used the later)
    1 tsp. white wine vinegar
    1 tbsp. chopped fresh tarragon
    1 tbsp. chopped fresh oregano
    2 scallions, green part only, thinly sliced

    Combine all ingredients in the bowl of a food processor; purée until smooth.

  • Baking Bread & Feeding Bees

    Baking Bread & Feeding Bees

    The heat has returned to North Texas.  It seems as though we might break that record after all for # of days with temps reaching 100 or higher.  After all those wicked hot days we’ve had I said, “why not tack on a couple of more just to break the all time record!”  Fall is just around the corner – right?  I don’t know if I’ve ever looked more forward to cooler weather than I do right now!

    In my anticipation of fall I baked a Peach & Banana Loaf.  I had about half a bag of peaches left over from the Upside Down Cake   https://theorangebee.com/2011/09/10/hatch-is-history-and-peach-upside-down-cake/ and decided to toss them into the banana bread.  It is a delightful, moist, full of flavor quick bread.  The peaches add just the right sweetness and with the wheat flour there is a health benefit as well.  If you or your family don’t eat this up within a couple of days, be sure and store it in the refrigerator to keep it fresh.

    Now for a little bee news.  I am currently feeding all but two hives and am waiting on Dan my man to cut a hole for one more feeder to place on Queen April’s hive.  Last week they looked to have plenty of honey stored up but when I checked today they showed signs of needing some help in the pantry.  Hives, Queen Rita and Queen Heidi devoured a quart each in 24 hours, so once again my hunch was right that they will need food for the rest of the summer and possibly into early fall.  I enjoy going out to the apiary to refill feeders as the bees seem pleased to see me show up with buckets of syrup.

    The greatest news is, an acquaintance approached me today after gym class and asked if I would teach her how to become a bee keeper.  Lucky for her I was feeding today and invited her out to observe.  Besides feeding, I opened two hives to show her what it looks like down inside those pretty boxes and she is the luckiest, as we saw both Queen April and Queen Elena.  Mr. F told me that my pay back to him for teaching me all he has would be to do the same if anyone ever asked me to.  I’d have never guessed it would happen so soon but I am happy to teach and help establish a new beekeeper.  Any more takers?

    Enjoy!

    Peach & Banana Loaf

    Ingredients:
    1 1/2 cups white flour
    1 cup wheat flour
    1 1/4 cup brown sugar
    1 tsp. baking soda
    1 tsp. Salt
    2 1/2 tsp. cinnamon
    1/2 tsp. nutmeg
    1/2 cup chopped pecans
    2 ripe bananas, mashed
    1/2 cup milk
    2 eggs
    2 tsp. lemon juice
    1 cup fresh peaches, mashed

    Preheat oven to 350*.  Grease a medium loaf pan, I use my stone loaf pan.

    In a mixing bowl mix the flours, brown sugar, soda, salt, cinnamon and nutmeg.  Whsiky until thoroughly mixed,

    In a smaller bowl beat the eggs.  Add the lemon juice, milk and mashed banana.  Drain the peaches in a colander, reserving juice.

    Slowly mix the wet ingredients into the dry ingredients.  If the mixture seems to dry add a little of the peach juice at a time.  Be careful not to add too much.  (I didn’t need to add any)  Stir in the mashed peaches and nuts.

    Pour the mixture into the prepared loaf pan and bake in the middle of the oven for about an hour.  Check for doneness by inserting a toothpick into the center of the loaf.  when the toothpick comes out clean the loaf is done.  Cool for about 10 minutes, then turn out onto a rack to complete cooling.


  • Hatch Is History and Peach Upside-down Cake

    Hatch Is History and Peach Upside-down Cake

    Peach Upside-down Cake

    Hatch recipes are history for a while – I’ve moved on to peaches.  Throughout the summer I’ve found it interesting to see my fellow bloggers in different parts of the country blogging about peaches. Greg and Katherine over at Rufus’ Food and Spirits Guide: http://rufusguide.wordpress.com/ have blogged about peaches since late June. You can find recipes for yummy Peach Jam, Peach Margaritas and Deep Dish Peach Cobbler.  They live in Arkansas.  Sarah at Pearl & Pine:  http://pearlandpine.blogspot.com/ posted about the cutest little Fruit Hand Pies, one filled with peaches, back in June.  She resides way up in the north-west, in Seattle.  The last one I’ll mention is Ryan whose blog is fittingly called Ryan Bakes, she’s from Virginia. Peach Blueberry Coffeecake, Peach Cherry Chutney with Breaded Pork Chops and Peach Salsa are a few of her posts from her “Peach Week” which started July 25. Summer and peaches seem to go hand in hand, no matter what part of the country we live in.

    I started talking about peaches back in March when I first noticed my bees devouring nectar and carrying pollen to the hives from my peach tree blossoms.  In early June I wrote about the first harvest of peaches from my trees, followed by a Peach & Mango Salsa recipe in mid-June, then there was Peachy Keen Cobbler, which I baked for my friend Linda from Rhode Island in late June.  She writes a very informative blog, with delicious and healthy recipes called: http://vittlesandcommittals.blogspot.com/, check it out.  At the end of August I brought out peaches from the freezer, (my own fresh frozen) for Peach-Hatch Salsa.

    With the end of summer approaching I’m reminded of how quickly my peach season came to an end this year.  I suppose lack of rain along with our soaring temperatures had something to do with it. Luckily I harvested a few pounds of peaches this summer and was able to freeze several bags to enjoy when old man winter rolls around.  They sure came in handy last weekend when we were invited to dinner at the home of some dear friends to hear about their trip to Africa. I was in the baking mood and offered to bring dessert – a Peach Upside Down Cake.  This cake is nothing like the old upside down cakes of the Baby Boomer (1946-1964) or Silent (1925-1945) generations.  No canned fruit was used in the making of this cake.  The peaches caramelize into perfection, the cake itself is light but holds up well to the peaches when flipped upside down.  I’ll be bookmarking this recipe to use again and again.  I loved hearing the compliments lavished on me when dessert was served, I admit the cake was a scrumptious!

    Enjoy!

    Peach-Upside Down Cake
    Ingredients:

    3/4 cup butter, softened, divided
    1/2 cup packed brown sugar
    2 cups sliced, peeled fresh peaches
    3/4 cup sugar
    1 egg
    1 tsp. vanilla extract
    1 1/4 cups all-purpose flour
    1 1/4 tsp. baking powder
    1/4 tsp. salt
    1/2 cup milk

    Melt 1/4 cup butter; pour into an ungreased 9-in. round baking pan.  Sprinkle with brown sugar.  Arrange peach slices in a single layer over the sugar.  (I inserted  raspberries in-between peaches and in the center for a little extra color, this is optional)

    In a large bowl, cream sugar and remaining butter until light and fluffy.  Beat in egg and vanilla.  Combine flour, baking powder and salt; add to the creamed mixture alternately with milk, beating well after each addition.   Spoon over peaches.

    Bake at 350* for 45-50 minutes or until a toothpick inserted near the center comes out clean.  Cool for 10 minutes before inverting onto a serving plate.  Serve warm.

    recipe from Taste of Home website

  • Hatch Chile Recipes, Sugar Syrup & Labor Day

    Hatch Chile Recipes, Sugar Syrup & Labor Day

    Hatch Chile Sausage Cornbread

    The last long weekend of summer is upon us and I’m in the mood for Hatch chiles and cooler weather.  Labor Day, sends that message of less heat outdoors and more heat on the stove.  Traditionally it has been unacceptable to wear white after Labor Day.  Do you follow this rule?  I tend to follow it not so much because it’s tradition but because I look forward to the cool days of fall and darker, richer colors.  Don’t misunderstand, I like to sport white clothes all summer long but come september I’m ready for a change.  Summer officially ends on September 22 and if our heat doesn’t let up you might catch me in something white between Monday and the 22nd, but never white shoes.  Fall is, as stated in an earlier post, my favorite season.  I’m ok with packing away the whites – how about you?

    I have much more pressing matters to write about.  Like hatch chiles and sugar syrup.  I made two recipes with hatch chiles this week, neither of which seem appropriate for our sweltering heat.  I made Hatch Chile Sausage Cornbread and Hatch Chile Potato Soup. My family really likes it when I make this soup and we turned the air down to be sure it was nice and cool in the house while we ate it.  It is easy, hearty and versatile.  I made the cornbread as a dinner diversion the night before.  My man, Dan kept saying, “We’re just having cornbread and salad?”  Like he couldn’t wrap his head around that being enough to fill his belly for dinner.  I reminded him it was all about those hatch chiles he loves so much  – I guess we should have labeled this week “Hatch Chile Week” as the majority of our meals included the tasty peppers in one form or another.  After it was all said and done he commented that it had been a really good dinner.  The cornbread tender and filling, crusty on the outside, with bites of spicy sausage made a perfect accompaniment to the soup the following evening.

    Now, on to feeding bees.  Two of my hives are still eating sugar syrup.  They seem happy to see me when I remove the empty jars and replace them with fresh jars full of syrup.  I’m including some photos today for you to see how it works.  When I remove the empty jars there are always a few bees clinging to the top,  looking for that last slurp of sugar syrup.  I always brush them off at the front door and they scurry inside, probably headed back up to the syrup hole.  If I fill the jar, replace it and wait a few seconds then lift the jar again it is always covered with girls going about their business of collecting syrup to carry down into the hive.  I like doing this – as it lets me know they do need this extra food until more food is available outside.  I get a kick out of watching them work and go about their bee business.

    Getting the last drop of sugar syrup
    Waiting for the syrup jar to be refilled.

    The good news about outside is that this week a plant called “Snow on the Mountain” is starting to pop up all around us.  It fills the pastures throughout fall and is a good source of food for my bees.  Unfortunately it makes honey referred to as “hot” honey and doesn’t taste good to humans, but is satisfactory for the bees.  Also, this week I’ve seen a few bees on the “Abelia” shrubs getting pollen and nectar.  I first noticed a change while watching bees come and go from the entrances of their hives.  I noticed pollen packed legs!  This excited me as I know how desperate they are for pollen and nectar. The pollen is creamy white and bees are bringing it in to every hive.

    Getting pollen and nectar from Abelia.

    Ahhhh, now I’m waiting for a cooler day, windless and sunny when I can inspect every hive from top to bottom.  I haven’t opened up my hives as often as I like since we put up the tarps to give relief from the heat.  This next week they are predicting cooler temps and it’s sounding good for bee keeping chores.  Stay tuned…

    If you haven’t gotten any Hatch chiles yet don’t wait too long as they will disappear from the stores.  I guess if you live in New Mexico this may not be true but I know in my neck of the woods they are about to disappear until next August.

    Enjoy!

    Hatch Chile Potato Soup

    Hatch Chile Potato Soup

    Ingredients:
    1 medium onion, chopped
    4 Hatch chiles, roasted, seed, peeled and diced
    1 teaspoon salt
    1 teaspoon ground pepper
    3 garlic cloves, minced
    1 quart chicken stock
    6 medium Yukon Gold potatoes, unpeeled and chopped
    2 tbsp. olive oil
    1 cup Crema, sour cream or plain yogurt
    Additions of chopped chicken or ham can be added for a heartier soup.  I’ve made it with and without any meat and it is delicious either way.  This day I used about 2 cups cubed ham.

    In a heavy dutch oven or stock pot add the oil and heat, stir in the onion and half of the peppers, salt and pepper and cook until onion are slightly golden.  Stir in the garlic and cook briefly to release the aroma, 1-2 minutes.  Pour in the chicken stock; add the potatoes and bring to a boil. Reduce heat to a simmer and cook about 20 minutes, or until potatoes are tender.  Remove from heat and purée in a food process, blender or with an emersion blender (my fave) just until smooth.  Do not over-process or you will have gummy soup.  I prefer to leave a few chunks of potatoes but it can be served smooth or chunky.  Return to heat, stirring in remaining chiles, meat (if using) and crema.  Bring just to a boil then reduce heat and keep warm until time to serve.

    Hatch Chile Sausage Cornbread

    Ingredients:
    1/2 pound Hatch sausage
    2/3 cup each yellow cornmeal and flour
    1/4 tsp. baking soda
    2 tsp. baking powder
    4 tsp. sugar
    2 eggs
    2/3 cup sour cream
    1/4 cup canola oil
    2/3 cup fresh corn kernel (cut from the cob)

    Heat a 10″ cast iron skillet in the oven for about 10 minutes.  Meantime in a large bowl mix corn meal and flour with the rest of the dry ingredients.  Stir in the corn and sausage.  Mix eggs, sour cream and oil together and add to batter.  Pour into hot skillet and bake in a 400* oven for 25 minutes.

  • Peach-Hatch Salsa

    Peach-Hatch Salsa

    If you can’t beat the heat — may as well join it!  That’s just what we did last weekend when we brought home bags full of fresh hatch chiles from Central Market.  We sampled so many food items with hatch chiles in them that we didn’t even need lunch that day.  We brought home fresh hatch chiles, roasted hatch, hatch salsa, artisan goat cheese spread with hatch, hatch guacamole and last but not least, hatch brownies.  

    The hatch brownies were great, sweet and dense with a little nip of hot and spicy.  The guac disappeared in a flash and I’ve used the roasted chiles in this salsa, in omelets and in a cornbread dish, which you are likely to read about in a future post.  Can you tell, we really enjoy hatch chiles?

    Did you know that hatch chiles come from Hatch, New Mexico?  

    A small town between Las Cruces and Truth or Consequences , in the Mesilla Valley in the southwestern half of New Mexico.  Over Labor Day every year this small town hosts a “Hatch Chile Festival” complete with the crowning of a Hatch Chile Queen.  On their festival web site I found these facts about chiles you might also find interesting.

    Chile Facts & Recipes

    Warning

    Chile must be kept very cool and wet, preferably on ice while being transported. Chile should be frozen immediately. Chile will spoil very quickly (within a couple of days) if it is not kept properly. A cooler with ice is the best way to transport chile.

    • One fresh medium-sized green chile pod has as much Vitamin C as six oranges.
    • One teaspoon of dried red chile powder has the daily requirements of Vitamin A.
    • Hot chile peppers burn calories by triggering a thermodynamic burn in the body, which speeds up the metabolism.
    • Teas & lozenges are made with chile peppers for the treatment of a sore throat.
    • Capsaicinoids, the chemical that make chile peppers hot, are used in muscle patches for sore and aching muscles.
    • Chile peppers are relatives of tomatoes, potatoes, and eggplants, all belonging to the nightshade family.
    • The color extracted from very red chile pepper pods, oleoresin, is used in everything from lipstick to processed meats.
    • There are 26 known species of chile pepper, five of which are domesticated.
    • Adapted from the New Mexico Chile Institutes’ “Chile Pepper Facts”

    It’s great that these chiles can be roasted and frozen until needed.  I’ve put off doing just that as I can’t seem to drag myself out into the 105* temperature to roast chiles.  Right after I post this summery salsa recipe for you I plan on doing just that – dragging myself out into the heat to fire up the grill.  It will be worth it to have a freezer full of fresh roasted hatch for fall and winter menus and maybe I’ll try my hand at some of those hatch brownies.

    I threw this salsa together using peaches I’d frozen from my own trees.  I find that my own fresh frozen peaches taste sweeter and are juicer than any I can find in our local groceries.   This salsa is a delicious accompaniment to grilled chicken or fish or eaten as a snack with chips.  I even like it spooned over a scoop of cottage cheese for a healthy mid-morning snack or lunch.

    Enjoy!

     Peach-Hatch Salsa

    Ingredients:
    4 peaches, diced
    1 red bell pepper, seeded and diced
    1 green bell pepper, seeded and diced
    1 red onion, diced
    1 Tbsp. minced garlic
    2 Hatch chiles, roasted, peeled, seeded and diced
    1/2 cup orange juice
    1/4 cup fresh squeezed lime juice
    1/2 cup fresh cilantro, chopped
    2 Tbsp. guava jelly
    salt and pepper to taste

    In a large bowl combine all ingredients and mix well.  Cover and chill for one hour or overnight.

  • Lazy Sunday Po’Boys

    Lazy Sunday Po’Boys

    In an effort to beat the sweltering, oppressive Texas heat, I served my family Grilled Shrimp Po’Boys this weekend.  I did have to brave the soaring temps to grill the shrimp, but it was well worth the sweat. LuLu and her guy Mr. T,  came for a visit this weekend and I needed a dish I could make ahead and serve upon their rather late arrival.

    I haven’t had a shrimp or oyster po’ boy all summer and I thought this would be a good time to serve something cool and light.  My man Dan and I made a trip to Central Market to buy “hatch chiles” and while there I was able to get gulf shrimp.  My favorite, which you know if you’ve followed my blog.  (More on how I’ve used the hatch later in the week.)  Having my daughter and her guy for a visit was the perfect excuse to do a little special cooking.  I know for a fact they enjoy “moms” home-cooking.  It is one of the little pleasures of having your kids move on and come for visits, they seem to appreciate what once was taken for granted, a delicious, lovingly prepared, home-cooked meal served with a smile.

    The po’ boys were perfect for a late night summer meal.  I wanted light and refreshing, not too heavy on the mayo.  I came up with a combo using fresh tarragon, garlic and lemon, with just a bit of mayo to bind it all together.  I marinated the shrimp in lemon, white wine and garlic for a couple of hours earlier in the day, then grilled them, allowing them to cool before chopping and adding to the dressing ingredients.  This mixture kept perfectly in the refrigerator until ready to be made into our dinner.  Easy, easy and so tasty. The combo of sweet yet spicy tarragon, with garlic and lemon is a delightful mixture that also goes well with chicken.  This will be a meal I’ll make a few more times before summer slips away.  I hope you’ll try it too.

    It is now Sunday afternoon, a lazy Sunday for my man and me.  Kids gone, heat blazing outdoors, and no pressing matters which to attend.  Rather nice! Oh and football on TV, somehow it seems too soon for this great game to already be broadcast for our viewing pleasure, the best thing about it is, it reminds me that cool, crisp fall days are around the corner.  Fall is my favorite season, chilled, fresh air, beautiful colors of red, orange, and gold decorate the landscape, deeper blue skies and vibrant sunsets dominate my little corner of Texas and my soul feels refreshed after the long hot summer.

    Speaking of long hot summer, below you’ll see a photo of how the ‘bee yard’ currently looks.  In an attempt to help my bees survive the 60 some odd days of temps over 100* we rigged up these tarps to give some much-needed shade for the hives.  Every hive has a shim to give extra ventilation too. While the house slept, early this morning, I ventured out to feed Queen Anne and Queen Elena and their colonies.  I shot these photos in the early morning light with hundreds of busy bees already out for their daily runs.  I was thrilled to see many bees returning to the hives carrying pollen.  Very creamy, light-colored pollen.  I am not sure the source but it’s been a while since I’ve observed them carrying pollen and they need pollen stores for the winter.  Pollen is a source of protein for bees.  This was a good morning!
     Queen Elena’s colony grew by about 500 bees earlier this week with the rescue of a cluster of bees, left behind when their hive was removed.  My man, Dan and I had removed a hive of bees in the floor of a storage shed, a bee call from a guy named Scott. It was dangerously hot on the day we removed the hive, but it was a successful removal.  I found the queen after we brought them home and set them up in the apiary.  2 days later Scott called to say there were still a few bees hanging around the old hive site.  I decided to go and get them and reunite them with their colony in my bee yard.  Capturing the cluster was simple and we headed home ready to pour them into their new hive.

    Now, it gets interesting!  When I went out to the bee yard to add them into Mary, Queen of Scotts hive I removed the cover and didn’t see many bees milling around.  Hmmmm…removing a few frames revealed that Mary was no longer in residence nor were her girls.  Only a few remained, meaning they had swarmed.  This was my first experience with a hive of bees leaving my apiary.  If I speculate correctly, they didn’t find a good food source in their new surroundings and decided to take off.  Maybe I should have put a queen excluder on the hive to prevent this action.  Decided to chalk that up as a learning experience and move on to the more pressing matter of what to do with the 500 bees I’d just brought home from Scotts!

    Knowing that they were now without a queen and probably hungry I drew on some past experiences and decided to go with the newspaper trick of combining bees.  I knew hives Anne and Elena could both be larger, I chose to put them in Elena’s hive as it is the smallest in number of bees.  My next obstacle was how to feed both Elena and her girls and feed the new ones until they all decided to live in harmony in one hive with one jar of syrup.  It was so hot outside that I covered everyone up and came back up to the house to problem solve.  Remember -“bee keeping is nothin’ but problem solving!”  After giving it some thought and cooling off I came up with a scheme.

    Here it is; I placed an inner cover with a hole larger than a jar lid as the top to Elena’s hive.  I placed the sugar syrup jar over the hole and covered the rest of the hole with newspaper.  Next I added a super on top of that, placed 4 frames of comb from the hive I’d removed at Scotts and poured in the 500 bees.  This left room for the feeder jar and gave the bees a place to hang out, (on the frames).  They also would hopefully smell Queen Elena and eat through the newspaper to meet her – peacefully!  Then I put another cover with a hole for a feeder jar as the top and added a jar of sugar syrup for the new girls to drink from.  On top of this I put a deep hive body and a lid, to protect the syrup from direct sunlight and heat.  I was pretty proud of myself and crossed my fingers that my solution to unite the bees would be effective.
    Queen Elena – is the larger bee in the center of the photo.

    I waited 2 days and went out to see if the bees had eaten through the newspaper and were co-mingling.  To my delight they had eaten through the paper and were all going and coming as a happy family.  I removed the paper and kept the top super, filling in the empty spaces with new frames and foundation, replaced the top with a jar of syrup and put on the roof!  Upon inspection today everyone seems happy and busy.  I am sorry that Mary Queen of Scotts left but happy for the opportunity to enlarge a small colony and do some problem solving.  Each problem solved is written in a journal and will be used for reference in the future.  Welcome to bee keeping!

    Now for the recipe.  Enjoy!

    Grilled Shrimp Po’Boys
    Ingredients:
    1# fresh shrimp, peeled
    2 stalks celery, chopped
    3 green onions, chopped
    2 cloves garlic, finely minced – divided
    1 tsp. fresh tarragon, chopped
    1/8 cup light mayo
    juice of two lemons – divided
    fresh ground pepper
    3 tbsp. olive oil
    1/2 cup white wine
    Fresh hoagie or sub rolls

    Place shrimp in a large baggie and add olive oil, juice of one lemon, 1/2 clove of chopped garlic, white wine, and a few turns of fresh ground pepper. Allow shrimp to marinate 1-2 hours.  Meantime, prepare dressing with remaining ingredients (celery-pepper).  Mix well.

    Grill shrimp over medium hot grill until pink.  After shrimp have cooled, chop and add to remaining ingredients.  Refrigerate until ready to serve.  I split fresh hoagie rolls, toasted slightly and filled with the shrimp mixture.  We enjoyed this light meal with fresh slices of watermelon and a glass of Sauvignon Blanc!


  • My 7 Links

    My 7 Links

    I like this game.  Thank you to Ryan for tagging me to play.  If you’ve not seen her blog give it a look it’s called Ryan Bakes and you’ll love what you see there.  She’s part Italian and part southern, and it makes for a fabulous combination in her kitchen!

    The reason I like this game is that I had to delve back into my archives for appropriate posts.  I’ve blogged for 7 1/2 months and I’d forgotten some of my early posts.  The food blog world has millions of participants, all of us with a reason for writing a blog. This game is just one of the ways we can network with each other and share other blogs with our readers.

    How the game works:  There are 7 categories to link to a post you’ve already written, and then you tag 5 blogger friends to take their turn.  There are 2 Rules:  1 Link per category.  2.  Tag 5 other Bloggers

    My 7 Links Game – Enjoy!

    1. Most Beautiful:  Peaches, Peaches, and More Peaches

    I love this photo.  The light is beautiful, the fruit perfect and the landscape green.  Food au naturel and at it’s finest.  I chose this for its simplicity and wholesomeness.

    2. Most Popular: Banana Blackberry Bread

    I am a little baffled  – but this post gets the most hits on a daily basis.  Don’t get me wrong it is delicious, just am amused at how many times people hit it.  Maybe it’s because blackberry season has recently been upon us.

    3. Most Controversial: Cheesecake

    I haven’t had any controversial comments posted yet, thankfully,  but I chose this photo as it is the one and only photo I have submitted to FoodGawker, Tastespotting, etc. that has been accepted.  Personally I think the photo is a little cheesy, but it was appropriate for the post I wrote that day.  The controversy lies with me in wondering how it can be the only photo they have accepted.

    4. Most Helpful: What A Nice Surprise

    This post was only helpful for you, my readers, if you are around bees and are attached to your cell phone.  It was helpful to me however, as a documentary film maker found this photo on my blog and asked permission to use it in his film about the state wildflower of Oklahoma.  Also I was given the Versatile Blogger Award which helped boost my confidence in this big ole’ blogger world.

    5. Surprisingly Successful: King Ranch Casserole

    I’m not much of a casserole maker but made this for a lunch I catered.  It got favorable reviews.  It does look all cheesy and yummy!

    6. Didn’t Get The Attention It Deserved: Italian Creme Cake

    Maybe the photo didn’t do the cake justice, or maybe you had to be there to taste it, or maybe it was all the champagne imbibed that evening, but this cake is out of this world delicious and it got very little respect.  No prob… I still love y’all!

    7. Most Proud Of: Whoa Nellie Here We Go

    I don’t even have a photo to go with this post.  It was my very first post and after I finished I was pretty happy with myself.  As I typed, the words flowed and I truly enjoyed the process.  I probably hadn’t figured out how to add photos yet. Before I began to blog I had no idea how much I would enjoy it.  Check out those I’ve tagged below, they are just a few of the talented bloggers I’ve discovered along the way.

    Tag you’re it!

    LinAnn at: Vittles and Committals
    Mary     at: One Perfect Bite
    Angela  at: The Good Soup
    Sarah    at: Pearl and Pine
    Andie    at: Can You Stay For Dinner 

  • Screaming For Ice-Cream

    Screaming For Ice-Cream

    This week school begins and I am the proud mama of a senior!  I think she already has a touch of senioritis – is there a remedy for that?  Yep!  Miss T’s last year of high school and I am vastly aware of how fast it will pass.  We don’t see much of her anyway as she was recently hired by Starbucks as a Barista.  I’ll admit she looks pretty great in her black on black on black uniform complete with a Starbucks baseball cap!  Part of me is sad that my baby will head off to college this time next year, but part of me can’t help but dream of what adventures my man Dan and I will seek as empty nesters.  I hope to have more time for cooking and blogging, and of course bee keeping.

    The Texas heat has not let up but we did have a short but much-needed rain shower early last evening.  It was glorious!  The wind blew and the air-cooled off, we just sat and enjoyed feeling the giant raindrops splatter on our feet.  I would have liked the drop in temperature on Thursday however, when we went to remove a hive of bees from a storage shed in a hot back yard.  Yes, Queen Mary and hive #7 moved into the apiary Thursday afternoon.  These girls had found a small hole into a space between a floor and a sub-floor of this little storage shed. After my man Dan ripped the floor apart I was able to remove their hive along with the queen.  Success!  Dan named her “Mary, Queen of Scotts”; as the man who called for the removal was named “Scott”.  I like his sense of humor.  Still praying for more rain so that fall will bring a last round of food for the bees, before they hunker down for winter.

    It was 104* that day and we got plenty hot while working outside in the middle of the day.  The only thing I seemed to have an appetite for was ice cream.  In the August issue of “Southern Living” I’d noted a Lemon Meringue Ice-Cream Pie. In fact there was an entire section devoted to ice cream treats, but being a lover of lemon I chose this one.

    I have never made homemade lemon curd and let me tell you, it’s well worth the standing and stirring required at the stove.  Honestly, I could eat it with a spoon straight out of the jar and be soooooo happy!  This pie is easy, but I should warn you, it is also time-consuming. After making and baking the vanilla wafer crust, it must cool completely, same goes for the lemon curd.  The ice cream needs to soften to a spreadable state and then be refrozen before serving the pie.  I discovered that freezing overnight is best.  Oh! and the meringue is whipped over a pot of boiling water.  Ha – I had to laugh at myself, all I wanted was to make and eat something cold and I spent a great deal of time stirring and mixing over a hot stove.  Nonetheless, this pie is a dreamy combination of tart lemon curd, sweet wafer crust and creamy vanilla bean ice-cream.

    Enjoy!
     Lemon Meringue Ice-Cream Pie

                Ingredients

    • 2 pt. vanilla ice cream
    • Vanilla Wafer Crust – recipe follows
    • 1 1/2 cups Homemade Lemon Curd – recipe follows
    • 16 vanilla wafers
    • Meringue Topping – recipe follows

                Preparation

    • 1. Let ice cream stand at room temperature 5 minutes or just until soft enough to spread. Spoon 1 pt. ice cream into Vanilla Wafer Crust. Top with 3/4 cup lemon curd; repeat with remaining ice cream and lemon curd. Gently swirl ice cream and curd with a knife or small spatula. Insert vanilla wafers around edge of pie. Cover and freeze 8 hours.
    • 2. Spread Meringue Topping over pie. If desired, brown meringue using a kitchen torch, holding torch 1 to 2 inches from pie and moving torch back and forth. (If you do not have a torch, preheat broiler with oven rack 8 inches from heat; broil 30 to 45 seconds or until golden.) Serve immediately, or cover loosely with plastic wrap, and freeze 4 hours or up to 1 week.
                    Vanilla Wafer Crust

                 Ingredients

    • 2 1/2 cups coarsely crushed vanilla wafers
    • 1/4 cup powdered sugar
    • 1/2 cup butter, melted

                 Preparation

    • Preheat oven to 350°. Stir together crushed vanilla wafers, powdered sugar, and melted butter; firmly press on bottom, up sides, and onto lip of a lightly greased 9-inch pie plate. Bake 10 to 12 minutes or until golden brown. Remove from oven, and cool completely (about 1 hour).
                            Lemon Curd
    •       Ingredients

      • 2 cups sugar
      • 1/2 cup butter, coarsely chopped
      • 2 tablespoons lemon zest
      • 1 cup fresh lemon juice (about 6 lemons)
      • 4 large eggs, lightly beaten
      Preparation
      • 1. Stir together first 4 ingredients in a large heavy saucepan over medium heat, and cook, stirring constantly, 3 to 4 minutes or until sugar dissolves and butter melts.
      • 2. Whisk about one-fourth of hot sugar mixture gradually into eggs; add egg mixture to remaining hot sugar mixture, whisking constantly. Cook over medium-low heat, whisking constantly, 15 minutes or until mixture thickens and coats back of a spoon. Remove from heat; cool completely (about 1 hour), stirring occasionally. Store in an airtight container in refrigerator up to 2 weeks.

      Meringue Topping

      Ingredients

      • 2 egg whites
      • 1 1/4 cups sugar
      • 1 tablespoon light corn syrup
      • 1 teaspoon vanilla extract

      Preparation

      • 1. Pour water to depth of 1 1/2 inches into a 3 1/2-qt. saucepan; bring to a boil over medium-high heat. Reduce heat to medium, and let simmer.
      • 2. Meanwhile, combine egg whites, next 3 ingredients, and 1/4 cup water in a 2 1/2-qt. glass bowl; beat mixture at high-speed with an electric mixer until blended. Place bowl over simmering water, and beat at high-speed 5 to 7 minutes or until soft peaks form; remove from heat. Beat to spreading consistency (about 2 to 3 minutes). Use immediately.

    Southern Living 

    AUGUST 2011


  • A Cookie To Share

    A Cookie To Share

    I may never bake another regular sized chocolate chip cookie again.  I admit I am a sweets fanatic and these giant size cookies are just my style.  I can eat only one and be completely satisfied.   These cookies are big enough to share and that is a very nice thing to do!  I am not a very good sharer, particularly when it comes to food.  I’ve been known to share a sweater, perfume, pens, books, nail polish, etc. but when it comes to food, I usually want my portion all to myself.  That’s the thing about this cookie – I am able to break it in half and share, willingly.  Take note, this is a rare occasion.

    Since my man Dan helped me put a shady cover over my bee hives the girls are much more comfortable.  Oh, our temperature is still reaching 3 digits but they aren’t working as hard to stabilize the temperature in their hives.  I am still feeding two hives and they are happily guzzling their sugar syrup.  Later in the week I will be able to make a full inspection of all the hives and I’ll keep you posted.

    Enjoy!

    Giant Chocolate Chip Cookies 

    Ingredients:
    3/4 cup butter or margarine
    1/4 cup shortening
    3/4 cup sugar
    3/4 cup firmly packed brown sugar
    2 eggs
    1 tsp. vanilla extract
    21/4 cups flour
    1 tsp. baking soda
    1/4 tsp. salt
    1 12 ounce package semisweet chocolate chips
    Large handful of chopped pecans, or your favorite nut

    Preheat oven to 350*.  Cream butter and shortening together; gradually add sugars, beating well at medium speed with an electric or stand mixer.  Add eggs and vanilla, beat well.  Combine flour soda and salt, mix well and add to creamed mixture, mixing well. Stir in chocolate chips and nuts.

    Drop dough by 1/4 cupfuls onto ungreased cookie sheets.  Lightly press each mound of dough into a 3-inch circle with fingers.  Bake for 15-17 minutes.