Honey Can Cook

Tag: Sugar

  • One Pot Dinner

    One Pot Dinner

    The Texas Rangers are in the “World Series”!  I’m not a huge baseball fan but when we get into the playoffs I’m there.  Now that we’re there, my adoring hubby and I want to cheer on our team – he’s  like me when it comes to baseball…when we’re in the playoffs he’s in.

    In lieu of heading outdoors to grill our dinners, I’m enjoying making some one pot meals in the kitchen where I can keep up with the score.   (more…)

  • Fair Food

    Fair Food

    Big Tex

    “Howdy folks, and welcome to the great state fair of Texas”, spoken by none other than Big Tex, the oversized icon with his commanding presence, booming voice and 10 gallon hat.  His voice resounds over the grounds of the “State Fair of Texas” for three full weeks in late September and early October every year, this year marking number 125. Yep, that’s right the great state of Texas has carried on this tradition for 125 years.

    Those of us that live in Texas learn about the fair from a very young age.  A memory I’ll (more…)

  • Broccoli & The Boss

    Broccoli & The Boss

    My father-in-law, whom I love dearly because he makes me laugh, can be a bit bossy at times.  Occasionally it is warranted that he show his bossiness other times not so much.  I usually go along because after all I’m the in-law and  he’s really not all that hard to get along with.  Anyway, somebody has to be Boss.

    One way I know to please him is to make special meals unlike what he cooks for himself.  (more…)

  • Rosemary Goat Cheese Spread

    Rosemary Goat Cheese Spread

    Until recently, I’ve been appetizer challenged.  You would never catch me volunteering to bring the appetizer to a dinner party or casual get together.  If you’ve followed my blog for a while you’ve no doubt noticed a small handful of appetizers grace the pages of The Orange Bee.  With the addition of this fantastically delicious goat cheese spread I’m beginning to feel phlegmatic.  Someone invite me to bring the appetizers, please! (more…)

  • A Million Dollar Cat & Muffins

    A Million Dollar Cat & Muffins

    We all have them from time to time; those worrisome events in our lives that turn life upside down or inside out.  This week was upside down for me.  I am a soft hearted animal lover and this week I’ve had a very sick kitty. Now I know human sickness is hard to deal with but when it’s a pet, and they cannot speak and tell you what exactly is happening or how they really feel, my heart just breaks. Marley, our orange kitty, chosen by Miss T and named by Miss T but fed, watered, taken care of and loved by moi spent the entire week in the vet clinic with kidney/bladder issues.  He is home now but not completely out of the water.  We’re keeping our fingers, crossed for his health to improve daily until he’s healthy enough for kitty surgery followed by a normal, healthy kitty life.  I mean cats do have 9 lives – don’t they?

    He’s now our million dollar cat owing to the fact that the vet bill was in the neighborhood of that.  So we’ll be eatin’ beans and rice and pb&j’s for a while.  Not good blog material. All kidding aside, it’s been a stressful week around The Orange Bee but I did manage to turn out some tasty, healthy banana muffins.

    In my freezer I had some fresh picked blackberries that sounded like a good addition.   My speculation  proved to be right on.  Bursting with juicy blackberries, quick, easy, moist, healthy, full of fiber and tasty these should be on your “to bake” list.  When you’re not busy in your kitchen or catching up on your favorite blogs take a minute to say a little prayer for Mr. Marley, it’ll be greatly appreciated.

    Enjoy!
     Million Dollar Muffins

    Ingredients:
    1 cup whole wheat flour
    1/2 cup all-purpose flour
    1 tsp. baking soda
    1 tsp. ground nutmeg
    1/4 tsp. salt
    2 eggs, lightly beaten
    1 cup mashed, ripe banana
    1/2 cup unsweetened applesauce
    6 tbsp. honey
    1 cup blackberries

    In a large bowl, combine the first five ingredients.  Combine the eggs, banana, applesauce and honey; stir into dry ingredients, just until moistened.  Fold in the blackberries.

    Coat muffin cups with non-stick cooking baking spray; fill two-thirds full with batter. Bake at 375* for 14-18 minutes or until a toothpick comes out clean.  Cool for 5 minutes before removing from pans to wire racks.  Yield 14 muffins.

    Here’s a tip for keeping your batter from turning purple.  Wash and then dry the black berries before gently folding them into the batter.

  • The Sun Sets On Grilled Rosemary Salmon

    The Sun Sets On Grilled Rosemary Salmon

    Around the Orange Bee we just can’t seem to escape from our leisurely evenings. Leisurely evenings and food blogging are not simultaneous.  I know from reading other food blogs that preparing the meal, photographing it and serving it before it becomes cold or your family loads up and heads to the nearest fast food joint, is a challenge we face regularly.  I don’t encounter this dilemma when I bake or make a little something simple; but when a meal is in the mix, and hungry family is lurking, the pressure is on.  I attempt to not put my family through this scenario too often.

    On the evening I made this scrumptious salmon it was only my man Dan and me, sipping our respective beer and wine and enjoying yet another evening on the porch, taking in the view, tossing a ball for the Border Collie, and watching the sun set.  What the sun is setting???????  Oh dear, gosh, goodness, throw that fish on a plate and shoot it!  It was a little frantic there for a moment, but the fish is a must try!   We topped a caesar salad with our salmon.  The fish is light, healthy, garlicky and fresh to the palate.  We enjoyed every last bite as we watched the sun slip beyond the horizon.

    Enjoy!

    Grilled Rosemary Salmon 

    Ingredients:
    Salmon filet for 2
    1/2 cup orange juice
    1/2 cup canola oil
    Rosemary-Garlic Paste (recipe follows)
    2-3 tbsp. fresh rosemary

    Rosemary-Garlic Paste
    1/2 tsp. rosemary, chopped
    3 garlic cloves, crushed
    1/2 tsp. salt

    Prepare paste, mixing rosemary, garlic and salt.  Rub paste on salmon.  Place salmon in a glass container.

    Whisk together orange juice and oil and pour over salmon, be sure salmon is completely covered.  Refrigerate for 2 hours turning frequently.

    Heat grill to HOT.  Grill salmon until meat begins to flake.  I do not flip my fish when grilling.  I buy fillets with the skin still on and place my fish skin side down on the grill, allowing it to cook until done.  Be sure not to overcook your fish.  Serve as an entrée or as a topper to Caesar salads.

  • Farmers Markets & Fried Okra

    Farmers Markets & Fried Okra

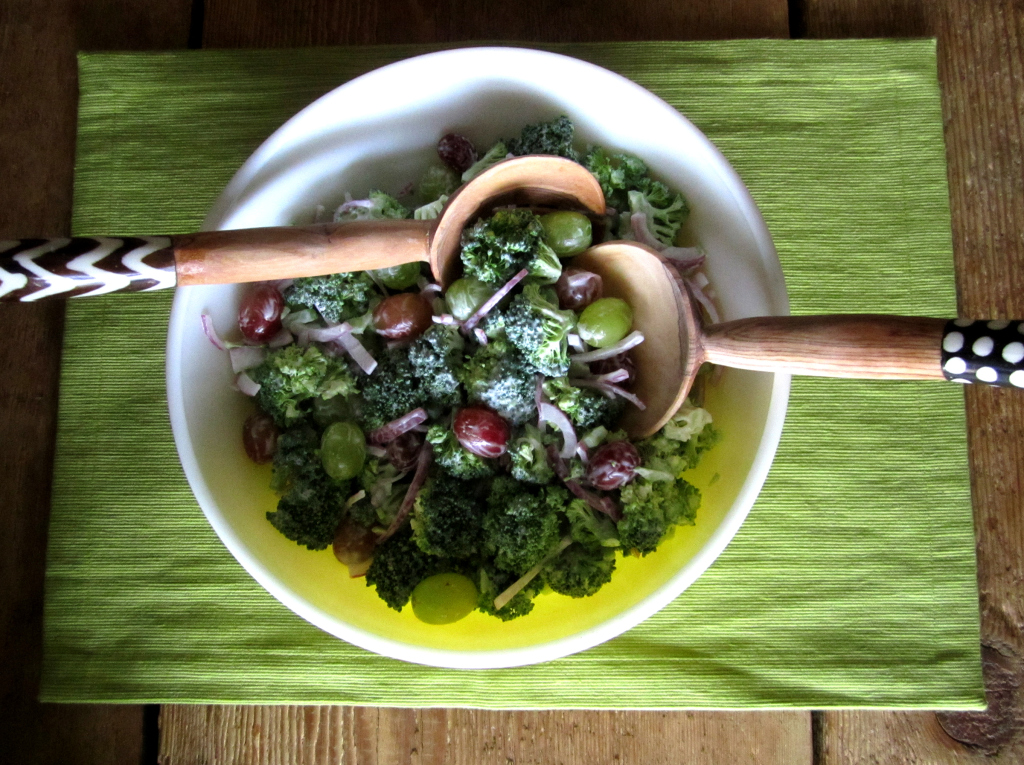
    We’ve visited a lovely and lively farmers market that is close by a few times this summer. Always leaving with lots of fresh, local veggies, fruits and homemade breads.  With our weather finally cooling off a bit it seemed perfect to hit the market again. Today we decided to check out a different one that turned out to be a complete flop.  This place had so much potential but no care given to the upkeep of the “place” nor the market itself. The only two vendors selling their goods were a bakery and a coffee roaster.  I did buy a yummy loaf of lemon bread and a bottle of flavored olive oil, since it was less expensive than I’ve seen in the stores.  The market touted itself as one where there would be local vegetable and fruit vendors as well as meat, poultry, eggs, milk, yogurt and cheese tables. Ok, sounds great!  Feeling pumped about having  a passel of veggies for the week and maybe some farm fresh eggs to boot, we loaded up Miss T and her friend and headed out.

    The site was about 20 minutes away from us.  We turned in at a farm-house drive with barns and lots of acreage behind the house.  We quickly realized there weren’t many farmers with tables full of the promised goods but decided to check it out anyway.  When I inquired about the brown bags sporting veggies the owner responded, “those are for our CSA members”, “Oh, cool”, I said.  Then I asked about the boxes with assorted squash, clearly fresh picked from a garden, “are those for sale?”  The response from the owner of this organic farm/market was, “well, I hadn’t planned on having any extras, I don’t even know what to sell them for.”  She stuttered on about this for a few minutes until I finally said, “ok, no problem, we’ll be on our way, thanks!”.  We left with me scratching my head saying, “well, if you don’t check them out you never know!” and wondering what we’d be having for dinner now that we were basically leaving empty-handed.

    Since todays market visit was a wash I went back in my photo archives and found these shots of fresh picked okra from the other market where they really did have vegetables and fruit for sale.  My man Dan won’t eat okra unless it has been fried and on this day I’d bought a bag full of okra with many small, tender pods just begging to be battered and fried whole.  This is such an easy task, especially when I set up the skillet on the grill burner outside.  No greasy smells or messy stove tops to clean in my kitchen.  The verdict is still out on what I’ll serve for dinner this evening.  I’ll start with a glass of chilled vino and see what sounds good after a few sips.

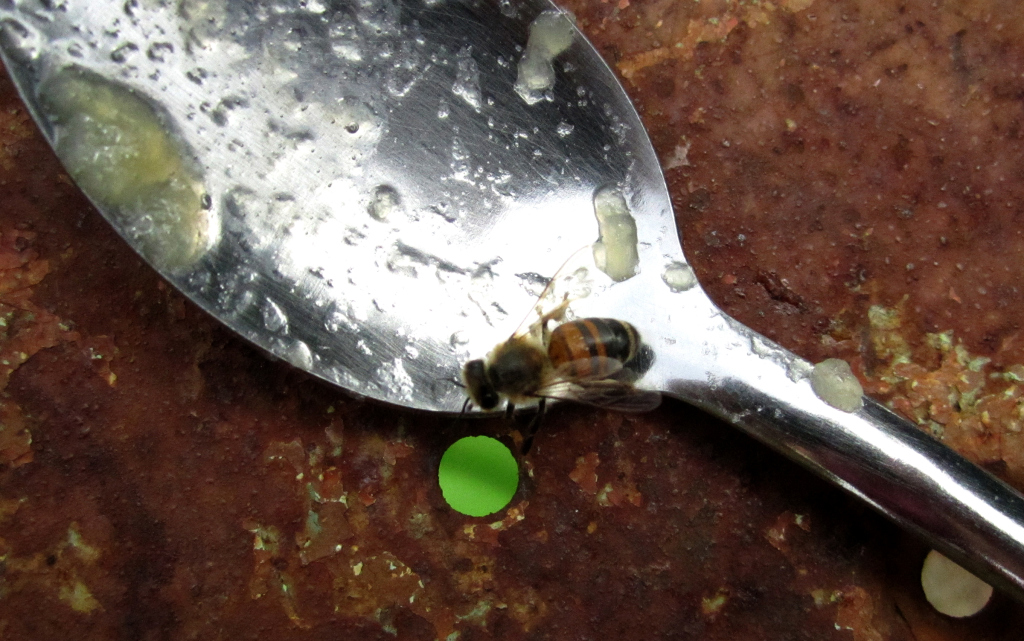
    I can’t leave without mentioning my bee girls.  Everyone is doing great and bringing in bookoos of pollen and making honey with the sugar syrup I am supplying.  Over at the Helmsley Palace bee yard things are going well too. Queen Leona and Queen Fiona have remained quite elusive, until today when I finally spotted Queen Leona while setting up a feeder on her hive.  She is solid black and very interesting, unlike any other queen in my colonies.  I didn’t try to take her photo today but closed her hive thrilled to have observed her.  Queen Fiona remains in hiding, if indeed a queen resides in that hive, which I suspect she does.   Further inspections will determine if in fact she is there or not, stay tuned for the rest of the story.

    Enjoy!

    Fried Okra 

    Ingredients:
    1 egg
    batch of okra
    splash of buttermilk
    cornmeal
    salt and pepper
    vegetable oil

    Whisk together the egg with a generous splash of buttermilk.  Pour enough cornmeal into a shallow dish to coat all of your okra, stir in salt and pepper to suit your taste.  If you have small tender pods they can be fried whole, otherwise wash and slice okra.  DIp okra into egg wash then roll in cornmeal mixture to coat.  Fry in a skillet with 2 inches of oil that is hot.  Oil is hot enough when a drop of batter sizzles upon contact.  Fry in batches, leaving plenty of space between okra.  Remove with a slotted spoon and drain on paper towels.


  • Smoky Beef & Chicken Ka-Bobs

    Smoky Beef & Chicken Ka-Bobs

    Lately adoring hubby and I are experiencing the pre-empty nester syndrome.  With Miss T in her senior year of high school and being employed by the ever popular Starbucks, we don’t see much of her, especially at dinner time.  Dinnertime has always been a family affair at our house.  Everyone sitting down at the same time sharing a meal, laughter and conversation about the days activities.  Some of the most memorable dialogs arise around our family table.  We carry on this tradition on the nights Miss T is home for dinner and even on nights when she’s “out” my man Dan and I have dinner together. When it’s just “us” we eat at the bar or if the weather allows, we dine al fresco.  All of this to say, “when she was home for dinner one night this week I grilled shish-kabobs”.  She is my little carnivore and I knew beef and chicken on the same plate would please her. We’ve been trying to incorporate more veggies into her diet and grilled veggies seemed like a good place to start.

    The meal was a success as she gulped down not only the sirloin and chicken, but the tomatoes and the zucchini.  Eating the zucchini was a first for my picky girl.  She declared it ,”not too bad”!  Happy mama, me.  My man Dan and I soaked up the time we had with her and sighed happily, as she headed back to her drawing table to work on her latest piece, a very cool painting of a mushroom!

    Some of you reading this have most likely experienced the pre-empty nester syndrome as well as the empty nester syndrome.  Others may be at the beginning of parenthood, changing diapers and oohing and aahing over every twitch of the nose or wiggle of the toes. Every stage of parenthood should be filled with joy and wonder at these little people who are born of us and who are our responsibility, challenging and rewarding all at the same time.  I’m told that no matter the age of our kids, “they will always be our babies”.  I relish that concept as it eases the sting of watching them grow up and away.  (Tear rolls down cheek)

    Now, you need to know about the kabobs.  I made a rub that would be tasty on both chicken and beef.  Using chipotle chile powder gave a nice smoky flavor to the meats.  I tossed the veggies in a little olive oil with a touch of salt and pepper, threaded them on skewers and fired up the grill.  I’ll be making a jar of this rub to keep on hand as it was the perfect mix of smoke, spice and sweet.

    Enjoy!

    Very cool mushroom

    Smoky Chicken and Steak Kabobs 

    Ingredients:
    Smoky Rub
    1 lb. skinned, boneless chicken breast
    1 lb. top sirloin
    1/2 large onion, cut into fourths and separated
    1 pt. cherry tomatoes
    1 large zucchini, halved and sliced
    Skewers
     Cut chicken and steak into 1″cubes.  Place chicken and beef in separate bowls, sprinkle half of rub over the chicken, sprinkle remaining half over beef, toss meats with rub.   Thread chicken and veggies on half of the skewers thread remaining veggies and beef on the other half, leaving a little room between pieces.  Grill kabobs covered over medium high heat until cooked through, turning skewers occasionally.

    Smoky Rub
    Stir together:
    2 tbsp. brown sugar, packed
    2 tsp. garlic powder
    1 tsp. chipotle chile powder
    1/2 tsp. ground cumin
    1/4 tsp. ground oregano


  • Homemade Applesauce & A Visitor

    Homemade Applesauce & A Visitor

    She says, "just a little taste, please".

    As I was looking through the lens of my camera, while photographing this applesauce, I heard a soft little “bzzzzz”.  I pulled my eye away from the camera to discover a sweet little bee stopping by for a sample of homemade applesauce.  Now she is one smart bee! The hives are not near where I was shooting but she must have been out foraging and “smelled” the applesauce.  I couldn’t help but let her savor a few bites before shooing her away and putting the lid back on the open jar of sauce, at which time she moved to the spoon and continued her feast.

    After making this batch of homemade applesauce I promise you I won’t buy it at the grocery store ever again.  Why would I?  This is so easy and when eaten warm right off of the stove it’s scrumptious.  Such plain fare yet so incredibly delicious.  It gives rise to the phrase an apple a day keeps the doctor away.  Only 4 ingredients are needed to make this healthy treat. Knowing that apple season is about to be upon us I will be experimenting with variations of this basic recipe.

    Mixing the types of apples yielded excellent texture as well as sweet and tart flavors.  I used Gala, Granny Smith, and Pink Lady apples. I’m sure any mixture of colors and types will be pleasing to your taste buds.

    Enjoy!

    Fresh Applesauce

    Fresh Applesauce

    Ingredients:
    12 large apples, peeled, cored, and coarsely chopped
    1 cup sugar
    2 tbsp. Honey
    1 1/2 tbsp. lemon juice

    Bring all ingredients to a slight boil in a Dutch oven over medium-high heat.  Reduce heat to medium-low and simmer, stirring often, 25-30 minutes or until apples are tender and juices thicken.  Remove from heat.  Serve warm or at room temperature.  Store in an airtight container in the refrigerator up to 2 weeks.

    Bee girl sampling applesauce for the first time.
  • Road Food

    Salty, slippery goodness.  Check out Road Food – Apalachicola – East Point Oyster Bar.